Professional Site Prep for Industrial Resinous Flooring
How professional contractors prep a concrete slab for epoxy or PU — grinding, shot blasting, moisture scan, crack repair. What to expect.
The short answer
For high-quality epoxy floor surface preparation, Malaysia facility managers know that the foundational work dictates the entire lifespan of the installation. A premium prep line item guarantees the concrete has the correct mechanical profile to prevent delamination.
We see countless coating failures in Johor Bahru that stem directly from skipped preparation steps.
Facility managers often question the heavy upfront costs. Taking the time for substrate repair and moisture mitigation prevents massive production shutdowns later.
Our crews treat the concrete foundation as the most critical phase of the project. Proper execution here secures a permanent bond for your epoxy system.
What this guide covers
This guide details the specific mechanical and chemical preparation standards required for industrial epoxy flooring in Malaysia. You will learn how to choose the right preparation method and evaluate surface readiness before applying resins.
We break down the technical differences between grinding and blasting methods. This comparison helps you specify the correct approach for your facility.
The following core topics outline a proper preparation sequence:
- Evaluating diamond grinding against shot blasting applications.
- Meeting the SSPC-SP13 standard for surface profiling.
- Conducting accurate moisture tests using advanced meters.
- Detailing joints and routing cracks to prevent telegraphing.
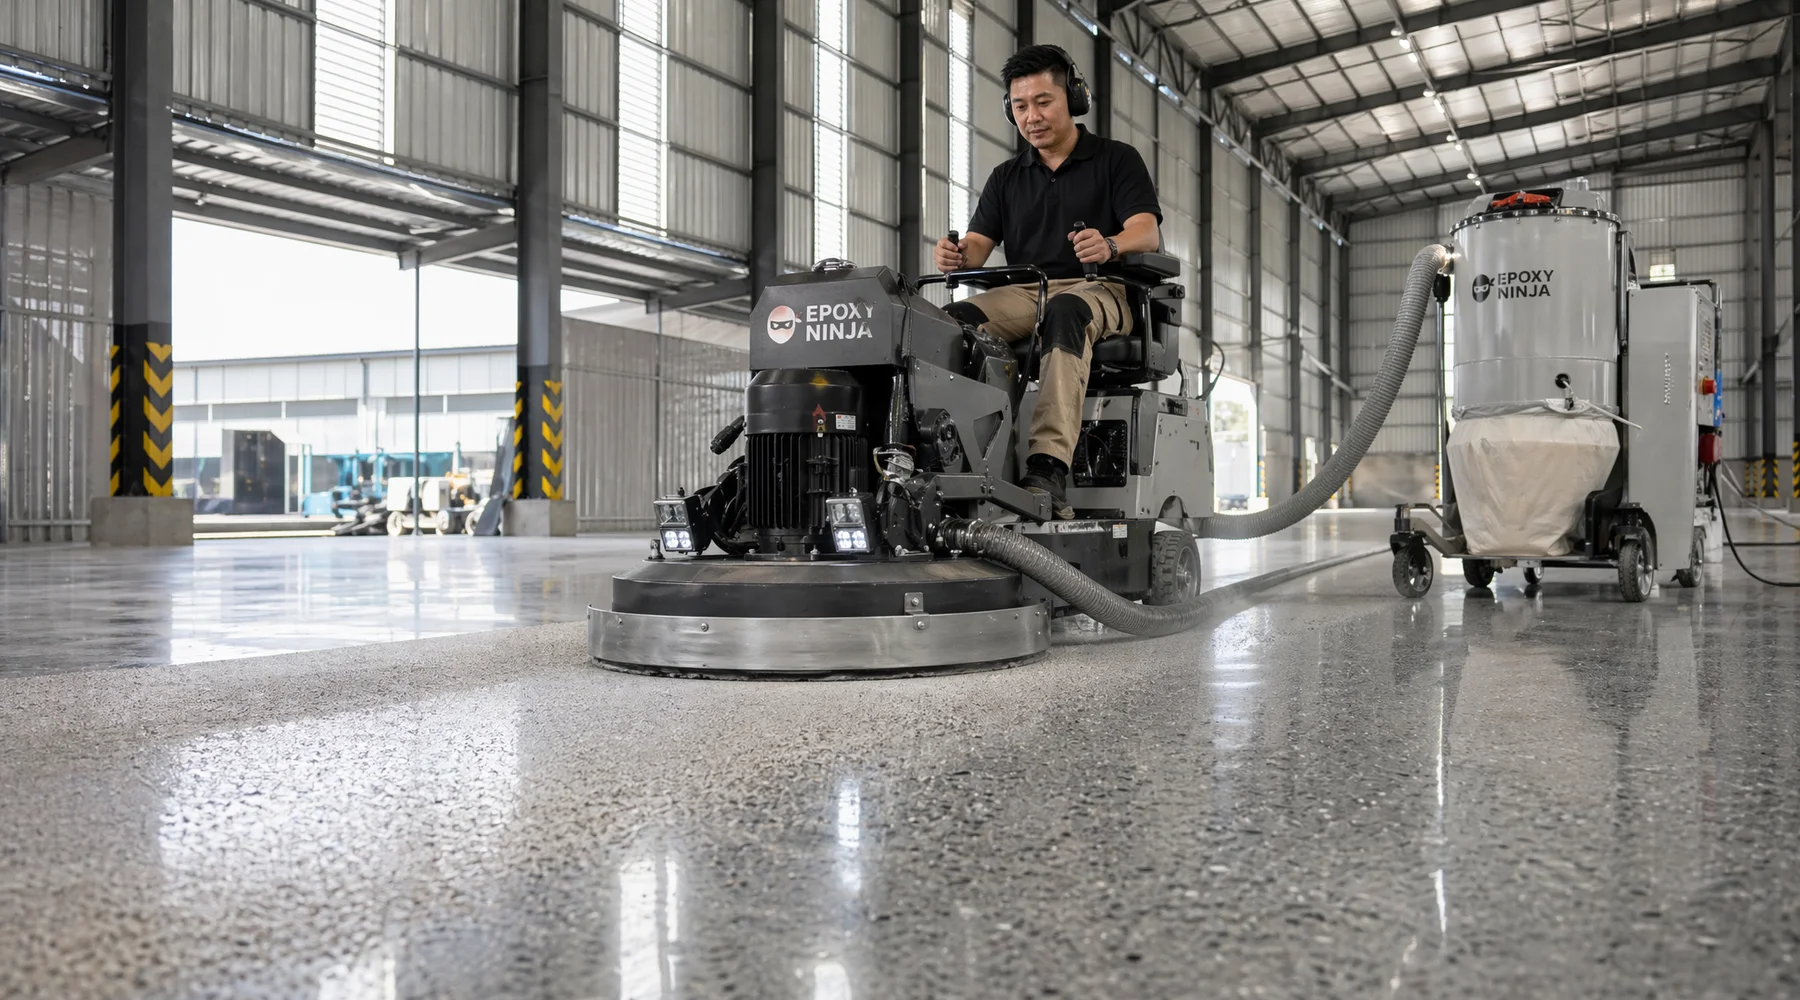
Diamond grinding vs shot blasting: when each applies
Diamond grinding uses rotating abrasive discs to smooth minor imperfections and strip away thin coatings. Shot blasting propels steel pellets at high speeds to aggressively clean heavily contaminated slabs and build a rougher texture.
Our technicians select the method based entirely on your required coating thickness and current concrete condition. Thin-film epoxy systems under 1.5 millimetres demand the smooth finish provided by diamond grinding.
Shot blasting shines when installing heavy-duty polyurethane systems thicker than 2 millimetres.
| Feature | Diamond Grinding | Shot Blasting |
|---|---|---|
| Best Application | Thin-film epoxies, smooth finishes | Thick urethanes, heavy resurfacers |
| Coating Thickness | Under 1.5 mm | Over 2.0 mm |
| Surface Result | Smooth, consistent profile | Highly textured, pitted profile |
| Dust Management | Highly controlled with HEPA vacuums | Requires extensive media cleanup |

SSPC-SP13 concrete surface profile standard
The SSPC-SP13 standard defines the exact requirements for cleaning, profiling, and drying concrete before applying industrial resinous coatings. It removes guesswork by establishing measurable acceptance criteria for mechanical surface preparation.
We follow this joint NACE and SSPC guideline to ensure every floor meets international quality benchmarks. The 2018 revision explicitly categorises mechanical methods like dry grinding and wet abrasive blasting.
Following these guidelines guarantees the substrate achieves the correct texture.
Understanding CSP ratings for epoxy
A proper mechanical anchor pattern is non-negotiable for chemical bonds. To achieve the optimal concrete surface profile epoxy bonds demand, industry standards classify these textures on a scale from CSP 1 to CSP 10.
Most commercial installations require a rating between CSP 3 and CSP 5. Our grinding equipment easily achieves a consistent CSP 3 for standard warehouse floors.
Heavy-duty processing areas might demand a CSP 5 profile achieved through aggressive shot blasting. Proper profiling increases coating adhesion by up to 60 percent compared to untreated concrete.
Moisture mapping before, during, and after prep
Moisture mapping identifies hidden water vapour trapped inside the concrete slab that causes epoxy coatings to blister and fail. Comprehensive testing gives you the exact data needed to specify appropriate moisture mitigation barriers before installation begins.
Our diagnostic process relies on the Tramex CMEX5 digital moisture meter for accurate, non-destructive readings. This specific device transmits a low-frequency electronic signal to evaluate impedance up to 20 millimetres deep into the slab.
Malaysia experiences intense tropical humidity that constantly challenges concrete floor installations. Ignoring this environmental factor virtually guarantees a delamination failure within the first year of service.
We conduct three distinct testing phases to secure your investment:
- Initial scanning: Identifying baseline moisture content across the entire facility.
- Post-prep verification: Checking the exposed capillaries after grinding to measure true internal humidity.
- Pre-application clearance: Confirming the slab meets the ASTM F2659 testing standard immediately before mixing the resin.
This continuous monitoring catches rising dampness issues before the final topcoat seals the floor.
Crack routing, chase cutting, and control joint detailing
Crack routing involves cutting a specific V-shaped groove into existing fractures to expose clean concrete for repair materials. Control joint detailing fills expansion gaps with semi-rigid sealants to prevent heavy forklift traffic from shattering the slab edges.
We use specialised diamond chase cutters to open up these weak points safely. Skipping this step allows existing damage to telegraph straight through your new epoxy finish.
Filling a narrow, dirty crack with standard resin simply does not work. The routing process creates a mechanical profile that allows high-strength epoxy mortar to anchor deeply into the structure.
Proper joint stabilisation techniques
Concrete naturally expands and contracts with thermal changes in any large manufacturing plant. Rigid coatings applied straight over these moving joints will inevitably crack under stress.
Our installation teams systematically clean out every control joint before applying any primer. Technicians then install flexible polyurea sealants that easily absorb structural movement while supporting heavy point loads.
This attention to detail prevents the most common forms of industrial floor failure.
What to do next
The most effective way to finalise your flooring plan is to schedule a professional site assessment. An expert evaluation identifies your specific concrete conditions and provides a clear, accurate cost breakdown.
If you are weighing this decision for your facility, finding the right epoxy floor surface preparation Malaysia team is your fastest next step. We bring a Tramex CMEX5 moisture meter to walk the substrate and document the exact chemical and thermal exposures.
Your management team then receives a written BQ with the honest cost paths. Expect no obligation and a same-day response across JB, Pasir Gudang, Skudai, Senai, and Iskandar Puteri.
Fast answers.
How long does site prep take for a 1,000 sqm floor?
Typically 1-2 days for grinding or shot blasting, plus crack repair time. A heavily contaminated or damaged slab can extend this to 3-4 days.
Can we keep production running during prep?
Partial — we can phase work by zone, but dust and vibration usually force one production area offline at a time.
Why can't you just scuff-sand and paint over the old coating?
Because the bond depends on the concrete profile beneath, not the old coating. Scuff-sanding on failing epoxy is a guaranteed early failure.
More in this cluster.
Common Causes of Industrial Epoxy Floor Failure (And How to Prevent Them)
The 5 reasons epoxy floors fail — moisture vapor, poor prep, wrong chemistry, thermal shock, chemical attack. Fixable with proper diagnostics.
Epoxy vs Polyurethane Flooring: How to Choose the Right System
Epoxy vs PU flooring compared — bond, thermal shock, chemical resistance, cost. Which wins for your factory? Honest answer inside.
How to Choose an Industrial Flooring Contractor in Malaysia
Vet your flooring contractor with 10 questions covering moisture testing, chemistry expertise, BQ transparency, and warranty. Red flags flagged.
Industrial Epoxy Flooring Cost Guide for Malaysia (RM per Square Foot)
Real RM per sqft for industrial epoxy and PU flooring in Malaysia. Ranges by system, factors that drive cost, and how to read a quote.
Ready for a real assessment? Free Tramex scan.
Guides are the general case. A site visit gives you the specific answer for your slab, your chemicals, and your operational conditions.