Fixing Blistering, Delamination & Pinholes
Root causes and fixes for blisters, delamination, and pinholes. When spot repair works, when full removal is the only answer.
The short answer
We see facility managers struggle to fix blistering epoxy floor issues across Johor Bahru every week.
These failures bring factory operations to a halt and create serious safety hazards. Our approach at Epoxy Ninja translates these failure modes into specific repair pathways with a clear indicator of when to completely remove the coating. For a direct look at how this works in practice, see our floor repair service.
What this guide covers
We built this guide to help you quickly diagnose and resolve epoxy floor damage in your facility. The first critical step is understanding the root causes behind every common failure mode.
Our team will walk you through exactly how moisture, contamination, thermal shock, and incorrect chemistry destroy industrial flooring. You will also learn the precise workflows for spot repairs versus full floor failure remediation.
Root causes for each failure mode (moisture, contamination, thermal, wrong chemi…
We trace almost all epoxy peeling and pinholes back to four core issues. Moisture vapour transmission is the biggest culprit for industrial facilities in Johor and across Malaysia.
Our tropical climate routinely pushes concrete slab relative humidity well past the safe limits. High moisture causes osmotic blistering, where trapped water vapour literally pushes the coating off the concrete.
We also frequently encounter chemical contamination from oils or previous coatings that were never properly removed. Thermal shock from hot water washdowns in commercial kitchens can cause rapid expansion and cracking.
Our final common finding is incorrect chemistry, such as using a standard product in a heavy-duty food processing zone. Selecting the wrong resin guarantees a shortened lifespan for the floor.
| Failure Mode | Primary Root Cause | Visible Symptom |
|---|---|---|
| Blistering | Moisture vapour transmission | Fluid-filled bubbles under the surface. |
| Delamination | Chemical contamination | Large sheets of epoxy peeling away. |
| Pinholes | Trapped air or outgassing | Tiny craters in the cured coating. |
| Cracking | Thermal shock | Fissures radiating across the floor. |
Diagnostic steps to fix blistering epoxy floor problems
We always begin the remediation process with a strict diagnostic protocol. Accurate testing prevents you from pouring new money over an old problem.
Our technicians start with a comprehensive moisture assessment using industry-standard tools. The ASTM F2170 relative humidity test provides the most accurate picture of what is happening inside the concrete slab.
Moisture scan
We use advanced equipment like the Tramex CMEX5 to map surface moisture instantly. This non-destructive test highlights the problem areas before drilling holes for the in-situ probes.
Our standard procedure requires three ASTM F2170 probe tests for the first 1,000 square feet to measure the internal relative humidity. A reading above 75% indicates a high risk for future delamination without a proper vapour barrier.
Pull-off adhesion test
We perform pull-off tests to measure the exact tensile strength of the existing bond. A bonded metal dolly gets pulled from the floor using a hydraulic gauge to see where the system breaks.
Our goal is to verify if the weak point is the concrete itself or the chemical bond between the layers. Test results below 300 psi usually dictate a complete removal of the old coating.
Visual mapping
We carefully walk the process zones to document every pinhole, crack, and blister. This visual map lets the actual site conditions dictate the necessary system.
Our documentation ensures you only pay for the specific repairs your facility requires. Spotting localized damage early often saves a warehouse manager thousands of ringgit in full replacement costs.
Spot repair workflow when substrate is sound
We recommend spot repairs only when the underlying concrete is dry and structurally sound. This targeted workflow saves both time and materials for localized bubbling or minor defects.
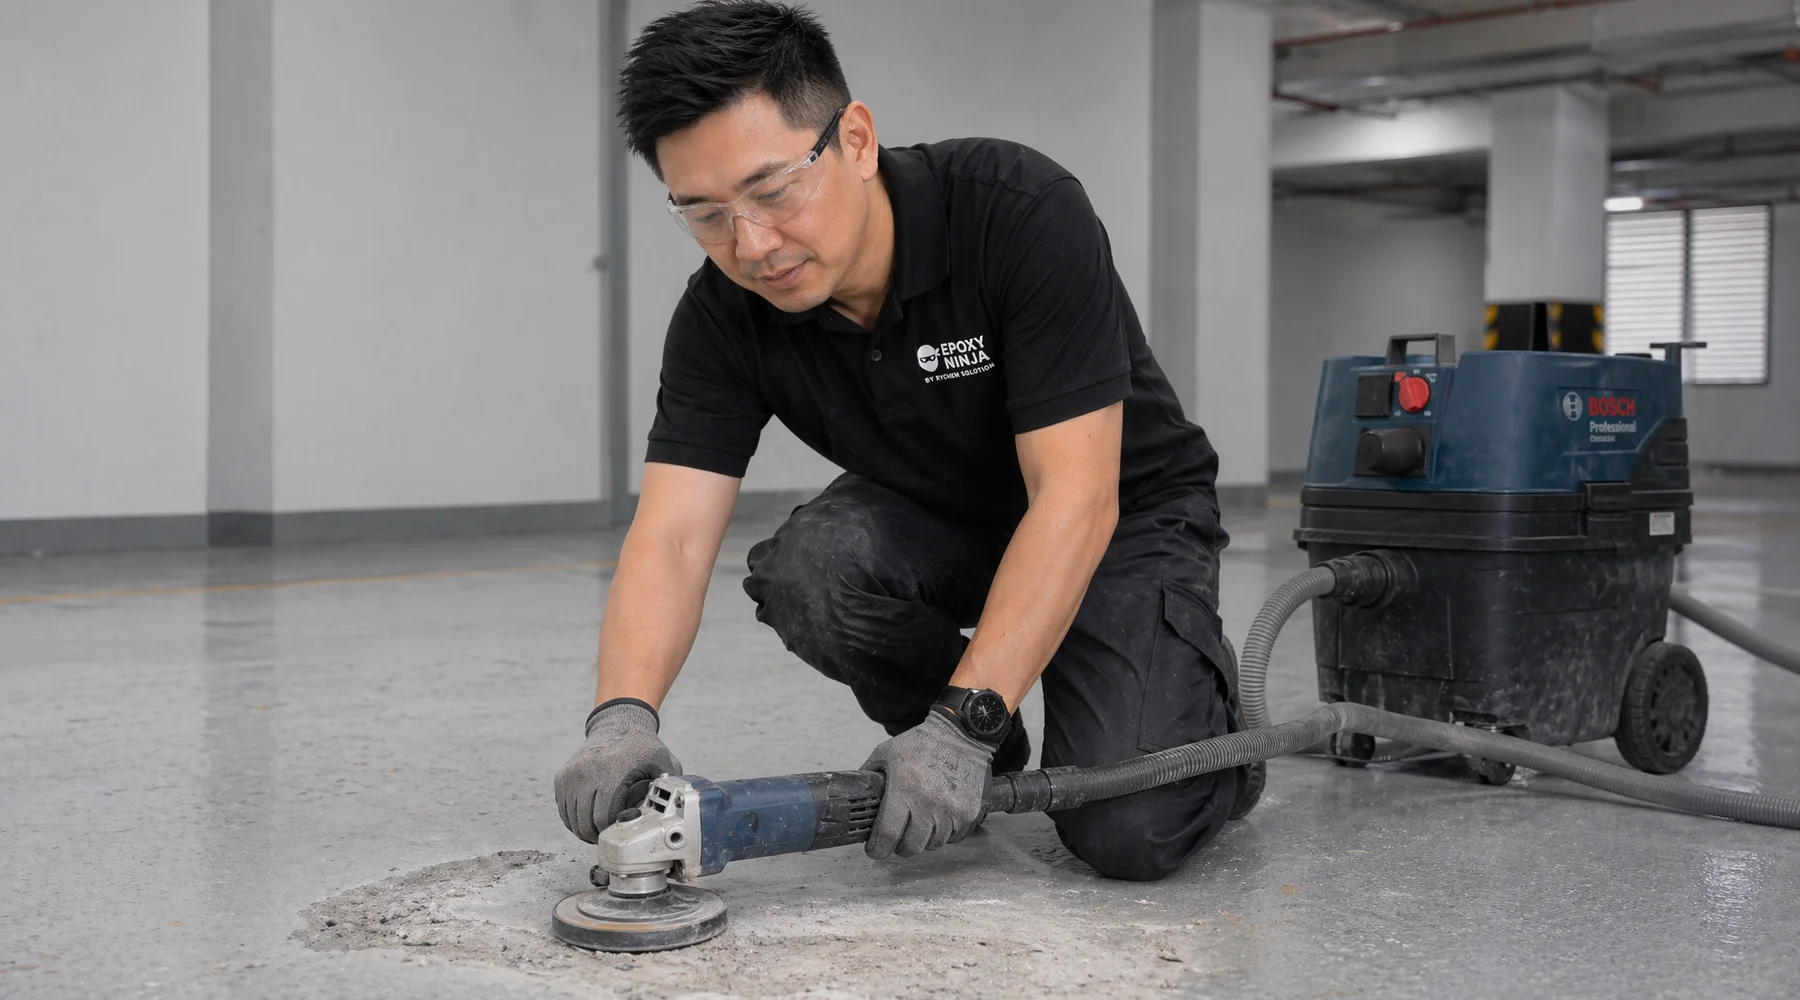
Our crews start by grinding away the damaged area until they reach a solid edge. The exposed concrete must be thoroughly cleaned and vacuumed to ensure perfect adhesion.
- Grind out the damaged section down to bare concrete.
- Apply a high-penetration primer to the exposed area.
- Patch the void with an epoxy mortar blend.
- Sand the patch flush with the surrounding floor.
We use a specific squeegee technique to execute a pinhole repair epoxy application on damaged topcoats. Pulling a flat squeegee tightly across the surface forces the new resin deep into the tiny voids.
Our experts know this method prevents trapped air from causing secondary failures. Fixing a small defect early prevents the damage from spreading outward.
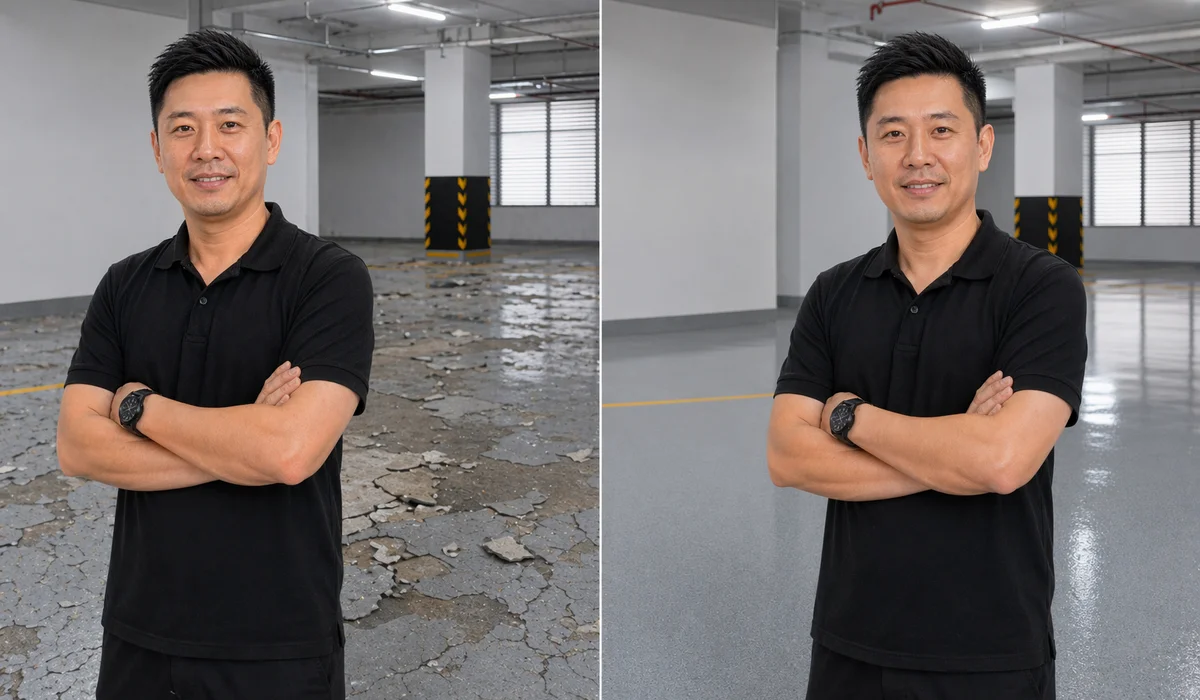
Full remediation workflow when >30% fails or moisture is widespread
We strongly advise full remediation when over 30% of the floor is failing or when moisture is widespread. Patching a highly compromised floor is just a temporary bandage on a terminal problem.
Our full replacement process starts with heavy planetary grinders to strip the floor down to bare concrete. A clean profile resembling medium-grit sandpaper is essential for the new system to anchor properly.
Installing the moisture barrier
We apply a specialized moisture vapour transmission barrier to high-humidity slabs. This layer blocks the osmotic pressure that necessitates a complete epoxy delamination repair.
Our selected mitigators can handle up to 100% relative humidity readings from the ASTM F2170 tests. The barrier cures to form an impermeable shield across the entire facility footprint.
Applying the final system
We follow the moisture mitigation with a high-build, industrial-grade coating. The specific topcoat chemistry is chosen based on the chemical and thermal exposures mapped during the audit.
Our final step involves a rigorous quality check to ensure a flat, pinhole-free finish. This comprehensive approach drives 60% to 80% of your floor’s actual service life.
For a closer look at related considerations, read our Concrete Moisture Testing Explained: MVER, RH, and Tramex guide.
What to do next
We offer a free, comprehensive site visit to factory owners needing to fix blistering epoxy floor issues permanently. The fastest way to get a lasting solution is to have an expert evaluate the damage in person.
Our team brings a Tramex CMEX5 moisture meter to document the chemical and thermal exposure accurately. You will receive a written bill of quantities with the honest cost paths clearly outlined.
We provide a same-day response across JB, Pasir Gudang, Skudai, Senai, and Iskandar Puteri with no obligation. The Floor Repair & Moisture Mitigation service page covers our system specifications in complete detail.
Our experts are ready to help you protect your facility from further downtime. Schedule an inspection today to get started.
Fast answers.
Can blisters be patched, or must I remove the whole floor?
Isolated blisters with dry substrate can be patched. Widespread blistering over a wet slab means removal and moisture mitigation.
What's the difference between pinholes and blisters?
Pinholes are tiny voids from solvent entrapment or rushed cure; blisters are moisture-driven and larger. Different root causes.
How long does a spot repair take?
A few square metres can be done in a day. Larger failure zones need proper sectional removal and multi-day rework.
More in this cluster.
Concrete Moisture Testing Explained: MVER, RH, and Tramex Mapping
MVER, RH, calcium chloride, and Tramex mapping — what each method measures, what the thresholds mean, and why it matters.
Epoxy Floor Repair vs Full Replacement: How to Decide
When to repair, when to fully replace. Decision matrix by failure area %, substrate integrity, system age, and downtime budget.
Industrial Floor Repair Cost Guide for Malaysia
Spot repair and full remediation RM/sqft ranges for industrial floors in Malaysia. Diagnostic fee structure and scope variance.
Signs Your Industrial Floor Needs Repair (Before It Fails Completely)
Blisters, edge lift, pinholes, powdering — catch floor failure early before it costs you a shutdown and full replacement.
Ready for a real assessment? Free Tramex scan.
Guides are the general case. A site visit gives you the specific answer for your slab, your chemicals, and your operational conditions.